2021年5月8日土曜日

macOSのPython3にNumPy, SciPy, matplotlibをインストールする.

macOSに付属していたPython 2では NumPy, SciPy, matplotlib がプリインストールされていました.一方で,Python 3にはそれらがインストールされていないため,別途インストールが必要です.

インストールする際には,ターミナルで以下のようなコマンドを実行します.

まずは,NumPyのインストールです.

% python3 -m pip install --upgrade numpy

python3 -m pip install コマンドを使って,NumPyをインストールします.
--upgrade オプションをつけると,古いバージョンがインストールされている場合には,新しいバージョンに更新されます.
以下は,上記のコマンドを実行した結果です.

Requirement already satisfied: numpy in /usr/local/lib/python3.9/site-packages (1.20.2)

Collecting numpy

  Downloading numpy-1.21.5-cp39-cp39-macosx_10_9_x86_64.whl (17.0 MB)

     |████████████████████████████████| 17.0 MB 915 kB/s 

Installing collected packages: numpy

  Attempting uninstall: numpy

    Found existing installation: numpy 1.20.2

    Uninstalling numpy-1.20.2:

      Successfully uninstalled numpy-1.20.2

Successfully installed numpy-1.21.5

次にSciPyのインストールです.実行するコマンドは以下です.

% python3 -m pip install --upgrade scipy

すると,以下のようにインストールが実行されます.

Collecting scipy

  Downloading scipy-1.7.3-cp39-cp39-macosx_10_9_x86_64.whl (33.2 MB)

     |████████████████████████████████| 33.2 MB 1.2 MB/s 

Requirement already satisfied: numpy<1.23.0,>=1.16.5 in /usr/local/lib/python3.9/site-packages (from scipy) (1.21.5)

Installing collected packages: scipy

Successfully installed scipy-1.7.3

最後にmatplotlibのインストールです.実行するコマンドは以下です.

python3 -m pip install --upgrade matplotlib

そうすると,インストールが始まります.

Requirement already satisfied: matplotlib in /usr/local/lib/python3.9/site-packages (3.4.2)

Collecting matplotlib

  Downloading matplotlib-3.5.1-cp39-cp39-macosx_10_9_x86_64.whl (7.3 MB)

     |████████████████████████████████| 7.3 MB 1.2 MB/s 

Collecting fonttools>=4.22.0

  Downloading fonttools-4.28.5-py3-none-any.whl (890 kB)

     |████████████████████████████████| 890 kB 1.2 MB/s 

Requirement already satisfied: cycler>=0.10 in /usr/local/lib/python3.9/site-packages (from matplotlib) (0.10.0)

Requirement already satisfied: packaging>=20.0 in /usr/local/lib/python3.9/site-packages (from matplotlib) (20.9)

Requirement already satisfied: pyparsing>=2.2.1 in /usr/local/lib/python3.9/site-packages (from matplotlib) (2.4.7)

Requirement already satisfied: python-dateutil>=2.7 in /usr/local/lib/python3.9/site-packages (from matplotlib) (2.8.1)

Requirement already satisfied: numpy>=1.17 in /usr/local/lib/python3.9/site-packages (from matplotlib) (1.21.5)

Requirement already satisfied: pillow>=6.2.0 in /usr/local/lib/python3.9/site-packages (from matplotlib) (8.2.0)

Requirement already satisfied: kiwisolver>=1.0.1 in /usr/local/lib/python3.9/site-packages (from matplotlib) (1.3.1)

Requirement already satisfied: six in /usr/local/lib/python3.9/site-packages (from cycler>=0.10->matplotlib) (1.15.0)

Installing collected packages: fonttools, matplotlib

  Attempting uninstall: matplotlib

    Found existing installation: matplotlib 3.4.2

    Uninstalling matplotlib-3.4.2:

      Successfully uninstalled matplotlib-3.4.2

Successfully installed fonttools-4.28.5 matplotlib-3.5.1


ちなみに,Seabornもデフォルトではインストールされていないので,別途インストールするには,以下のようになります.

hide@MBP ~ % pip3 install seaborn

Collecting seaborn

  Using cached seaborn-0.11.2-py3-none-any.whl (292 kB)

Requirement already satisfied: pandas>=0.23 in /usr/local/lib/python3.9/site-packages (from seaborn) (1.2.4)

Requirement already satisfied: numpy>=1.15 in /usr/local/lib/python3.9/site-packages (from seaborn) (1.21.5)

Requirement already satisfied: matplotlib>=2.2 in /usr/local/lib/python3.9/site-packages (from seaborn) (3.5.1)

Requirement already satisfied: scipy>=1.0 in /usr/local/lib/python3.9/site-packages (from seaborn) (1.7.3)

Requirement already satisfied: python-dateutil>=2.7 in /usr/local/lib/python3.9/site-packages (from matplotlib>=2.2->seaborn) (2.8.1)

Requirement already satisfied: pillow>=6.2.0 in /usr/local/lib/python3.9/site-packages (from matplotlib>=2.2->seaborn) (8.2.0)

Requirement already satisfied: kiwisolver>=1.0.1 in /usr/local/lib/python3.9/site-packages (from matplotlib>=2.2->seaborn) (1.3.1)

Requirement already satisfied: packaging>=20.0 in /usr/local/lib/python3.9/site-packages (from matplotlib>=2.2->seaborn) (20.9)

Requirement already satisfied: pyparsing>=2.2.1 in /usr/local/lib/python3.9/site-packages (from matplotlib>=2.2->seaborn) (2.4.7)

Requirement already satisfied: cycler>=0.10 in /usr/local/lib/python3.9/site-packages (from matplotlib>=2.2->seaborn) (0.10.0)

Requirement already satisfied: fonttools>=4.22.0 in /usr/local/lib/python3.9/site-packages (from matplotlib>=2.2->seaborn) (4.28.5)

Requirement already satisfied: six in /usr/local/lib/python3.9/site-packages (from cycler>=0.10->matplotlib>=2.2->seaborn) (1.15.0)

Requirement already satisfied: pytz>=2017.3 in /usr/local/lib/python3.9/site-packages (from pandas>=0.23->seaborn) (2021.1)

Installing collected packages: seaborn

Successfully installed seaborn-0.11.2


-----
pipコマンドを使ってインストールする際に以下のような警告が出る場合があります.

WARNING: You are using pip version 21.0.1; however, version 21.3.1 is available.

You should consider upgrading via the '/opt/homebrew/opt/python@3.9/bin/python3.9 -m pip install --upgrade pip' command.


/opt/homebrew/opt/python@3.9/bin/は,Python3(この場合は ver. 3.9)のインストールされている場所なので,環境によって異なります.
警告はpipを最新にするようにというないようなので,以下のように実行しておきます.

% /opt/homebrew/opt/python@3.9/bin/python3.9 -m pip install --upgrade pip

Requirement already satisfied: pip in /opt/homebrew/lib/python3.9/site-packages (21.0.1)

Collecting pip

  Downloading pip-21.3.1-py3-none-any.whl (1.7 MB)

     |████████████████████████████████| 1.7 MB 4.7 MB/s 

Installing collected packages: pip

  Attempting uninstall: pip

    Found existing installation: pip 21.0.1

    Uninstalling pip-21.0.1:

      Successfully uninstalled pip-21.0.1

Successfully installed pip-21.3.1


2021年5月7日金曜日

Pythonで予約語を表示するコマンドと組み込み関数を表示するコマンド

Pythonで予約語や組み込み関数を表示する際のメモです.

Pythonで予約語を表示するには"__import__('keyword').kwlist"というコマンドを用います.

>>> # 予約語を表示するコマンド

>>> __import__('keyword').kwlist

['False', 'None', 'True', '__peg_parser__', 'and', 'as', 'assert', 'async', 'await', 'break', 'class', 'continue', 'def', 'del', 'elif', 'else', 'except', 'finally', 'for', 'from', 'global', 'if', 'import', 'in', 'is', 'lambda', 'nonlocal', 'not', 'or', 'pass', 'raise', 'return', 'try', 'while', 'with', 'yield']

>>> 


組み込み関数を表示するには"dir(__builtins__)"というコマンドを用います.

>>> # 組み込み関数を表示するコマンド

>>> dir(__builtins__)

['ArithmeticError', 'AssertionError', 'AttributeError', 'BaseException', 'BlockingIOError', 'BrokenPipeError', 'BufferError', 'BytesWarning', 'ChildProcessError', 'ConnectionAbortedError', 'ConnectionError', 'ConnectionRefusedError', 'ConnectionResetError', 'DeprecationWarning', 'EOFError', 'Ellipsis', 'EnvironmentError', 'Exception', 'False', 'FileExistsError', 'FileNotFoundError', 'FloatingPointError', 'FutureWarning', 'GeneratorExit', 'IOError', 'ImportError', 'ImportWarning', 'IndentationError', 'IndexError', 'InterruptedError', 'IsADirectoryError', 'KeyError', 'KeyboardInterrupt', 'LookupError', 'MemoryError', 'ModuleNotFoundError', 'NameError', 'None', 'NotADirectoryError', 'NotImplemented', 'NotImplementedError', 'OSError', 'OverflowError', 'PendingDeprecationWarning', 'PermissionError', 'ProcessLookupError', 'RecursionError', 'ReferenceError', 'ResourceWarning', 'RuntimeError', 'RuntimeWarning', 'StopAsyncIteration', 'StopIteration', 'SyntaxError', 'SyntaxWarning', 'SystemError', 'SystemExit', 'TabError', 'TimeoutError', 'True', 'TypeError', 'UnboundLocalError', 'UnicodeDecodeError', 'UnicodeEncodeError', 'UnicodeError', 'UnicodeTranslateError', 'UnicodeWarning', 'UserWarning', 'ValueError', 'Warning', 'ZeroDivisionError', '_', '__build_class__', '__debug__', '__doc__', '__import__', '__loader__', '__name__', '__package__', '__spec__', 'abs', 'all', 'any', 'ascii', 'bin', 'bool', 'breakpoint', 'bytearray', 'bytes', 'callable', 'chr', 'classmethod', 'compile', 'complex', 'copyright', 'credits', 'delattr', 'dict', 'dir', 'divmod', 'enumerate', 'eval', 'exec', 'exit', 'filter', 'float', 'format', 'frozenset', 'getattr', 'globals', 'hasattr', 'hash', 'help', 'hex', 'id', 'input', 'int', 'isinstance', 'issubclass', 'iter', 'len', 'license', 'list', 'locals', 'map', 'max', 'memoryview', 'min', 'next', 'object', 'oct', 'open', 'ord', 'pow', 'print', 'property', 'quit', 'range', 'repr', 'reversed', 'round', 'set', 'setattr', 'slice', 'sorted', 'staticmethod', 'str', 'sum', 'super', 'tuple', 'type', 'vars', 'zip']

>>> 


2021年5月6日木曜日

大量のテキストデータをマージする

 Pythonで大量のテキストデータをマージする際のメモです.

大量のテキストデータをマージするPythonのコードを作成した際のメモです.
用途としては,Hi-netのダウンロードデータ(1分間)をマージすることを想定しています.

ダウンロードしたテキストデータは以下のような名前だとします(当然,これはこの例の場合なので,読み替えて下さい).

201412071000_Daimon_4b33
201412071000_Daimon_4b34
201412071000_Daimon_4b35

201412071059_Daimon_4b33
201412071059_Daimon_4b34
201412071059_Daimon_4b35

データの名前の末尾が"4b33","4b34","4b35"になっていますが,この末尾別にマージしたいとします.

コードは以下のようになります.

# Setting
new_file_UD = 'Daimon_UD.txt' # Set the file name!
new_file_NS = 'Daimon_NS.txt' # Set the file name!
new_file_EW = 'Daimon_EW.txt' # Set the file name!

# Import modules
import glob

# Data append function 
def data_append(file_path): 
    with open(combined_file, mode='a'encoding='UTF-8'as f:
        with open(file_path, mode='r'encoding = 'UTF-8'as fr:
            data = fr.read()
            f.write(data)

#U-D
# Create new file
combined_file = new_file_UD

# Execution 
for file in glob.glob('./Directory_name/*_4b33.txt'):
    data_append(file)

#N-S
# Create new file
combined_file = new_file_NS

# Execution 
for file in glob.glob('./Directory_name/*_4b34.txt'):
    data_append(file)

#E-W
# Create new file
combined_file = new_file_EW

# Execution 
for file in glob.glob('./Directory_name/*_4b35.txt'):
    data_append(file)

# Settiung では(マージして)作成するファイル名を設定します.ファイルを実行する際には,作成したいファイル名に設定します.この部分は必須ではなく,後述の "# Create new file "のところで設定しても良いのですが,プログラムの実行の際に書き換えたりする場所を限定したかったために,このような形式にしています.

# Import modules では,必要となるモジュール "glob" を読み込みます.

# Data append function では,以下の関数を定義しています.

  1. 書き込みを行いたいファイル(combined_file)を追記モード aで開く(f)
  2. マージしたいファイルのパスを読み込んで,そのファイルを読み込みモード rで開く(fr)
  3. 読み込んだファイル(fr)を data という変数に格納して,書き込みを行いたいファイル(f) に追記する( f.write(data) )

2021年4月18日日曜日

M1 Mac にHomebrewをインストール

M1 Mac (Apple Silicon) に正式対応したHomebrewがリリースされています.

M1 Macリリース当初はRosetta2を使ったり,/opt/homebrew 配下にインストールする必要があったとのことですが,Homebrew 3.0.0 からは正式対応しています(正式対応したからM1 Macを購入したのですが).以下はM1 MacにHomebrewをインストールした際のメモです.

まずは,Homebrewの公式Webページからインストールのためのコマンドを実行します.

% /bin/bash -c "$(curl -fsSL https://raw.githubusercontent.com/Homebrew/install/HEAD/install.sh)"

パスワードを入力すると,ズラズラとインストールが始まります.インストールログを見ると,/opt/homebrew 配下にHomebrewがインストールされていることがわかります.

==> Checking for `sudo` access (which may request your password).

Password:

==> This script will install:

/opt/homebrew/bin/brew

/opt/homebrew/share/doc/homebrew

/opt/homebrew/share/man/man1/brew.1

/opt/homebrew/share/zsh/site-functions/_brew

/opt/homebrew/etc/bash_completion.d/brew

/opt/homebrew


インストールの終了直前に,以下のように"Next steps: "として,brewにパスを通す指示が表示されます.

==> Next steps:

- Add Homebrew to your PATH in /Users/hide/.zprofile:

    echo 'eval "$(/opt/homebrew/bin/brew shellenv)"' >> /Users/hide/.zprofile

    eval "$(/opt/homebrew/bin/brew shellenv)"

- Run `brew help` to get started

- Further documentation: 

    https://docs.brew.sh


これは,指示の通りのコマンドを実行するだけです.

% echo 'eval "$(/opt/homebrew/bin/brew shellenv)"' >> /Users/hide/.zprofile

% eval "$(/opt/homebrew/bin/brew shellenv)"


一応,以下のようにHomebrewのバージョンを確認してみると,この段階ではver. 3.1.2 がインストールされていることがわかります.

hide@macMini ~ % brew --version

Homebrew 3.1.2

Homebrew/homebrew-core (git revision 2f56c335ea; last commit 2021-04-18)


こちらのHomebrewの公式ページによると,gnuplotはM1 Macにも対応しているとのことなので,インストールを行いました.

インストールのコマンドは以下のようになります.

% brew install gnuplot

バージョンを確認してみます.

% gnuplot --version

gnuplot 5.4 patchlevel 1


続いてMac TeXも以下のコマンドでインストールしてみます.

% brew install mactex --cask

インストールが完了したら,最新版にアップロードするために,以下のコマンドを実行します.

% sudo tlmgr update --self --all

このコマンドを実行したときに一度目は,sudo : tlmgr : command not found と返ってきて実行されませんでしたが,Terminalを立ち上げ直すと実行することができました(原因は不明です...).
続いて,実行しなくても良い気もしますが,一応A4をデフォルトに設定しておきます.

% sudo tlmgr paper a4


2021年4月6日火曜日

Windows10でのHDDの認識


Windows10でのHDDが認識されない時の対処法のメモです.

1.「コントロールパネル」を開き,「システムとセキュリティ」を選択します(コンピューター右クリックで「管理」でも).


2. 「記憶域(ディスクの管理)」を選択します.
3.増設したHDDを右クリックして「新しいシンプルボリューム」を選択します.

4.新しいシンプルボリュームウィザードの開始が開くので「次へ(N)」をクリックします.
5.表示される項目に変更を加えない場合は,その後「次へ(N)」をクリックします.変更が必要な場合は,適宜変更します.


6.最後に「完了」をクリックして終了です.

2021年3月19日金曜日

MacTeXをアンインストールする

Homebrew 経由でMacTeXをアンインストールする際には,以下のコマンドを実行します.

% brew uninstall mactex --cask


すると,以下のような表示になります.

==> Uninstalling Cask mactex

==> Uninstalling packages with sudo; the password may be necessary:

==> Removing files:

/Applications/TeX

Password:

/etc/manpaths.d/TeX

/etc/paths.d/TeX

/Library/TeX

/usr/local/texlive/2023

==> Purging files for version 2023.0314 of Cask mactex


上記の "brew cask uninstall mactex"コマンドでも,以下の3つは削除されないので手動で消去する必要があります.
  • /usr/local/texlive/texmf-local/
  • ~/Library/texlive/
  • ~/Library/TeXShop/

2021年3月18日木曜日

macOS Big Surをクリーンインストールした後のセットアップ

 昨日まで,Octaveのインストールなどをやってみていましたが,macOS Big Surをクリーンインストールしました.

それに伴って,アプリケーション等を改めてインストールした際のメモです.

クリーンインストールが終わった後にはTerminalのセッティングをしました.

Terminal > Preferences... で"Homebrew"をDefaultに設定した上で,"Text"タブでBackgroundのColor & EffectsのOpacityを90%に,FontをMenlo Regular 13pt.に,Textの色をTurquoiseに,Bold Textの色をLimeに変更しました.Windowタブでは,Window SizeのColumnsを100に設定しました.

Homebrewをインストールしました.Terminalから以下のコマンドを実行するとインストールが始まります.以前は,先にXCodeのCommand Line Toolをインストールしていましたが,Homebrewのインストールログを見ていると,自動でCommand Line Toolもインストールしてくれているようです.

% /bin/bash -c "$(curl -fsSL https://raw.githubusercontent.com/Homebrew/install/HEAD/install.sh)"


-----
gnuplotをインストールしました.

% brew install gnuplot

以前のようにX11 や aquaterm のインストールは不要となっていて,qt で描画します.

-----

TeXをインストールしました.TeXのインストールに関しては,以前の投稿が詳しいですが,入力したコマンドを以下に示します.

% brew install mactex --cask


上記のコマンドではTeXShopも一緒にインストールされるので,インストール完了後にTeXShopを立ち上げてTeXShop Preferenceから,右下にある"Set Default Value"からpTeX(ptex2pdf)を選びました.以下のコマンドの実行は必要ないかもしれませんが,一応,実行しておきます.

% defaults write TeXShop FixLineNumberScroll NO

% defaults write TeXShop SourceScrollElasticity NO

% defaults write TeXShop FixPreviewBlur YES


以前はAnacondaやMinicondaをインストールしてJupiter Notebookを使っていましたが,macOSには元々Python がインストールされているので,それを使うこととして,Jupyter のみをインストールすることにします.

% pip3 install jupyter

ちなみに...ですが,入力ミスをすると,以下のように注意してくれます.有難い.

% pip3 instal jupyter


CommandNotFoundError: No command 'conda instal'.

Did you mean 'conda install'?

 Jupyterのみをインストールしてみたは良いものの,Pythonは入っていたよな...と一応確認してみました.

% python3 --version

Python 3.9.2

入っていました.よかった....

Juliaをインストールします.こちらはHomebrewから brew cask install julia としてインストールしようと思ったのですが,下記のようにエラーが出てしまったので,Juliaのページから.dmgパッケージ(LTS)をダウンロードしてインストールしました.

% brew cask install julia

Error: Unknown command: cask

パッケージからインストールしたJuliaはver. 1.0.5 だったので,以下のようにパスを通します.

% echo "export PATH=${PATH}:/Applications/Julia-1.0.app/Contents/Resources/julia/bin" >> .zshrc


以前は,以下のようなエイリアスを登録することでも大丈夫でしたが,今回は試していません.

$ echo "alias julia='/Applications/Julia-1.0.app/Contents/Resources/julia/bin/julia'" >> .bash_profile


これで,以下のようにターミナルからJuliaを起動することができるようになりました.

% Julia

               _

   _       _ _(_)_     |  Documentation: https://docs.julialang.org

  (_)     | (_) (_)    |

   _ _   _| |_  __ _   |  Type "?" for help, "]?" for Pkg help.

  | | | | | | |/ _` |  |

  | | |_| | | | (_| |  |  Version 1.0.5 (2019-09-09)

 _/ |\__'_|_|_|\__'_|  |  Official https://julialang.org/ release

|__/                   |


julia> exit()


Jupiter Notebookでも使いたいので,以下のようにJulia pkgをインストールします."]"を押すと以下のようなpkg モードに切り替わります.pkgモードからはdeleteで抜けることができます.

(v1.0) pkg> add IJulia


ターミナルから以下のようにJupyter Notebookを立ち上げて,PythonとJuliaが選択できるようになっていればオッケーです.

hide@MBP ~ % Jupyter


2021年3月17日水曜日

macOSにオクターブをインストール(GUI版)

 昨日の投稿で,CUI版のインストールを行なったものの,Control pkg をインストールすることができなかったので,敢えなく断念してアンインストールしました.

今回はGUI版のインストールについてのメモです.

まずはOctave.appダウンロードページから.dmgファイルをダウンロードします.ダウンロードを行なった時点では,以下の画像のように 6.1.0 が最新バージョンでした.

.dmgファイルをダウンロードしたあとはダブルクリックするとウィンドウが開いて,Octaveアイコンをアプリケーションフォルダに移動させるように促されるので,その通りにします.

Octave-6.1.0のアイコンをクリックすると,GUIが立ち上がります.
まずは,コマンドウィンドウに以下のように入力してcontrol pkgをインストールします.
        >> pkg install -forge control
ズラズラと流れますが,エラーが出なければインストール成功です.
続いて以下のように入力してsignal pkgをインストールします.
        >> pkg install -forge signal
これまたズラズラと流れて,エラーが出なければインストール成功です.

そして,以下のようにsignal pkgをロードしてみて無反応(次の行に >> と表示されて入力を促される)であれば,(多分)インストール成功です.
        >> pkg load signal
        >>

一応確認のために,昨日と同じサインカーブを書いてみます.コマンドウィンドウに以下のように入力すると
        >> x = -2*pi:0.1:2*pi;
        >> y = sin(x);
        >> plot(x, y);
下図のようなサインカーブが描かれました.
インストールは成功していて,使うにあたっても問題ないものと思われます.

2021年3月16日火曜日

macOSにオクターブをインストール(CUI版...最終的には失敗)

だいぶん長いことOctaveは使っていなかったのですが,改めて使う機会があったので,改めて macOSにオクターブをインストールした時のメモです.

HomebrewでインストールされるOctaveはCUI版ですが,これは推奨されていないという噂もあるそうですが,Octave for macOSのページには,そのような記載はないので,Octave for macOSのページにあるように,Homebrew経由でインストールして見ます.

XcodeのCommand Line ToolsとHomebrewがインストールされていることが前提ですが,もしインストールされていない場合は,Command Line Toolsはターミナルから以下のようにしてインストールします.

% sudo xcode-select --install


Homebrewは,以下のコマンドでインストールされます.

% /bin/bash -c "$(curl -fsSL https://raw.githubusercontent.com/Homebrew/install/HEAD/install.sh)"


まずは,Octaveのインストールの前にHomebrewをアップデートします.

% brew update


続けてOctaveをインストールします.

% brew install octave

ズラズラとインストールが始まり,インストールの完了までにはそこそこの時間がかかります.

ターミナルでいかにように"Octave"と入力すると起動します.

% Octave

GNU Octave, version 6.2.0

Copyright (C) 2021 The Octave Project Developers.

This is free software; see the source code for copying conditions.

There is ABSOLUTELY NO WARRANTY; not even for MERCHANTABILITY or

FITNESS FOR A PARTICULAR PURPOSE.  For details, type 'warranty'.


Octave was configured for "x86_64-apple-darwin20.3.0".


Additional information about Octave is available at https://www.octave.org.


Please contribute if you find this software useful.

For more information, visit https://www.octave.org/get-involved.html


Read https://www.octave.org/bugs.html to learn how to submit bug reports.

For information about changes from previous versions, type 'news'.


試しに以下のように入力してみます.

octave:1> x=-2*pi:0.1:2*pi;

octave:2> y=sin(x);

octave:3> plot(x, y);


以下のような図が表示されたらインストールは成功です.
ここまでは良かったのですが,signal パッケージをインストールしようとすると,control パッケージが必要だと言われ,controllパッケージをインストールしようとすると上手くいきません....
困りました.

結構な格闘を続けたものの,control pkgをインストールできず,GUI版をインストールすれば,アラートが沢山出るものの,パッケージをインストールすることができたので,残念ながら,CUI版はアンインストールすることにします...

Octaveのアンインストールは,依存関係の有るライブラリーを全てアンインストールする必要があるとのことなので,まずはbrew-rmtreeを有効化します.

% brew tap beeftornado/rmtree


続けてアンインストールを行います.

% brew rmtree octave

ズラズラと流れて,アンインストール完了です.
GUI版のインストールについては明日の投稿でメモしておきます.

2021年3月13日土曜日

macOSにGMTをインストール

 macOSにGMT(ver 6.1.1)をインストールした際のメモです.

まずはgithubからGMTのインストーラーをダウンロードします.GMTはgithub内のGenericMappingTools / gmt というページにあります.このインストールを行った時点ではver 6.1.1が最新版でした.

macOSなので,専用のインストーラー(今回はgmt-6.1.1-darwin-x86_64.dmg)をダウンロードします.そして,インストーラをダブルクリックするとGMTのアイコンをApplicationフォルダに入れるように促すウィンドウが開くので,アイコンをApplicatrionフォルダにドロップします.
コピーが終わるとApplicationフォルダにGMTのアイコンが現れるので,アイコンをクリックして起動します.アラートが出た場合は,Security&Privacyから,許可して起動します.

軌道に成功すると以下のようなターミナルが開きます.

Last login: Fri Mar 12 21:43:06 on console

$ /bin/bash "/Applications/GMT-6.1.1.app/Contents/MacOS/GMT-6.1.1" GMT_PROMPT


GMT - The Generic Mapping Tools, Version 6.1.1 [64-bit] [MP] [8 cores]

(c) 1991-2020 The GMT Team (https://www.generic-mapping-tools.org/team.html).


Supported in part by the US National Science Foundation (http://www.nsf.gov/)

and volunteers from around the world.


GMT is distributed under the GNU LGPL License (http://www.gnu.org/licenses/lgpl.html).

Dependencies: netCDF, GDAL, PCRE, FFTW, LAPACK, ZLIB, Ghostscript, GraphicsMagick, FFmpeg.


usage: gmt [options]

       gmt <module name> [<module-options>]


options:

  --help            List descriptions of available GMT modules.

  --new-script[=L]  Write GMT modern mode script template to stdout.

                    Optionally specify bash|csh|batch [Default is current shell].

  --new-glue=name   Write C code for external supplements to glue them to GMT.

  --show-bindir     Show directory with GMT executables.

  --show-citation   Show the most recent citation for GMT.

  --show-classic    Show all classic module names.

  --show-cores      Show number of available cores.

  --show-datadir    Show directory/ies with user data.

  --show-dataserver Show URL of the remote GMT data server.

  --show-doi        Show the DOI for the current release.

  --show-library    Show path of the shared GMT library.

  --show-modules    Show all modern module names.

  --show-plugindir  Show directory for plug-ins.

  --show-sharedir   Show directory for shared GMT resources.

  --show-userdir    Show full path of user's ~/.gmt dir

  --version         Print GMT version number.


if <module-options> is '=' we call exit (0) if module exist and non-zero otherwise.


Note 1: If you want to use GMT outside of this terminal or in scripts, then follow these steps:

        a) export GMTHOME=/Applications/GMT-6.1.1.app/Contents/Resources

        b) add $GMTHOME/bin to your path

        c) export PROJ_LIB=$GMTHOME/share/proj

        d) export MAGICK_CONFIGURE_PATH=$GMTHOME/lib/GraphicsMagick/config

Note 2: GMT may use Ghostscript, GraphicsMagick, FFmpeg, and GDAL executables; see

        /Applications/GMT-6.1.1.app/Contents/Resources/share/Licenses for details.


まずは,インストールされているGMTのバージョン確認をしてみます.

bash-3.2$ gmt --version

6.1.1


GMTのスクリプトを書くときにはどんなエディタでも構いませんが,とりあえず,VSCodeで書くことにします.VSCodeのGMT用にハイライトをしてくれるプラグインは,こちらにしました.
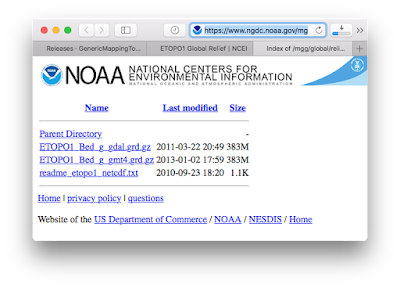
続いて,地形図のデータをダウンロードします.地形図データはNOAAのサイトからダウンロードします.
このサイトのETOPO1 Bedrock: Grid of Earth's surface depicting the top of the Antarctic and Greenland ice sheets.  grid registrated: netCFDをクリックしてます.なお,Bedrockの上にあるIce Surfaceの方は,南極などの氷床面を含めたデータです(元の容量が282MBで,回答すると933.5MBになります.このファイルのダウンロードには時間がかかる場合があります).